Overview
3ull City is a shared, persistent city that every player builds together on the same map. There's no separate world per player - the land, roads, and buildings you see are the same ones everyone else sees, and every action (buying land, placing a building, collecting production) is validated and recorded on the server, not just stored in your browser.
$W3ULL is the game's currency - every price displays in w3ULL with its dollar value, pegged to the real Playa3ull token (a base land plot ≈ $0.50). A simulated wallet binds a 0x address to your account today; real MetaMask login is the planned next stage. Your Ledger (My Assets) records every w3ULL movement with a running balance.


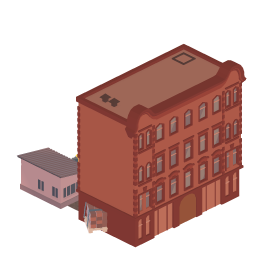
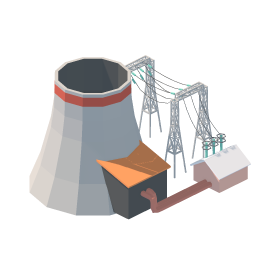
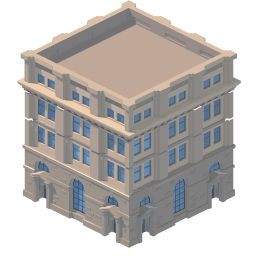
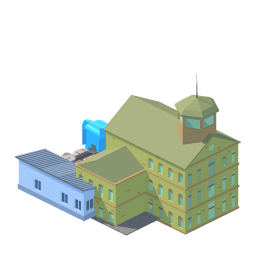
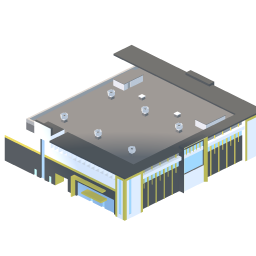
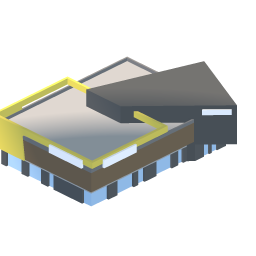

What's New - the manufacturing tier
The economy has grown a second half. Until now every chain ended at a raw material; it now runs all the way to finished goods that do something.
| Change | What it means for you |
|---|---|
| Components Plant (2x2) | Makes Batteries, Solar Panels, Water Tanks or Car Parts - you pick which. The first building in the game with a choice of recipe. |
| Car Assembly Plant (2x2) | Turns Car Parts and Batteries into Cars, Vans and Lorries. |
| Own your own vehicles | A vehicle you built or bought can be put on the road permanently - it never pays a hire fee again, and is never out on someone else's job. See Logistics. |
| Battery rarities | Every Battery rolls common / rare / epic / legendary when collected. Four goods, four market prices. See Markets. |
| Villa (2x2) | A prestige residence in the new Advanced Builds catalogue. |
| Fund rebalance | Global Fund up to 55%, Worker Fund down to 5%, and the Road / Utility Fund now actually pays out. See City Funds. |
| Energy halved | Power was piling up unsold while Water starved. Energy is now genuinely scarce. |
| Offices need everything | Road, wires and pipes. Miss one and the Office does not run. |
| Coastal houses need sand | The beach style is greyed out on inland plots. Apartments are the better fit there. |
Getting Started
There are two honest ways to play, and both work. Pick one to begin with.
Route A - the free player (start with nothing)
You need no land and no buildings. You make materials by hand and sell them to the people who do.
- Take excavation jobs. The Jobs board lists plots that need clearing - other players' land. Each dig pays 8 Dirt and 4 Gravel.
- Run three gathering plots. Dig Site (12 Dirt), Gravel Pit (10 Gravel) and Sapling (10 Lumber) are what builders cannot make for themselves. Tend them every 20-30 minutes.
- Sell it. Send goods to the market, then list them. Dirt, Gravel and Lumber always have buyers - six building types burn Dirt every cycle and nothing produces it.
Route B - the builder
- Buy a plot (from 7,840 w3ULL) and clear it - or let a free player excavate it for you.
- Build a House first. No home, no workers. Workers are what make everything else run.
- Claim a utility site. Power and Water plants can only stand on the marked energy and water plots, and there are just 12 of each on the island. They go early or they go to someone else.
- Lay pipes and wires outward from your plant. They must form a connected network - each new cell has to touch an existing one.
- Add one producer and get it staffed and connected before adding a second. An unstaffed, unconnected building runs at a fraction of its rate.
- Collect, then move. Watch the yard: when it is full, production has already stopped.
Tips for New Players
The five that cost people the most
- A full yard stops production. It is the single most common reason a building "broke". Move the goods.
- Level 2 is the wall, deliberately. An upgrade costs more than the building did, and more materials with it. You are meant to trade your way up, not save your way up.
- Specialise, then trade. Ten players all mining copper is a bad market. Pick a trade - miner, quarry, forester, brickmaker, smelter - and buy the rest.
- Pave the route you actually use. Roads do not make hauling cheaper, they make it faster: dirt is 15 minutes per 0.1 KM, smart road is 3.
- Own a warehouse near your buildings. Every haul to the city's public warehouse is a long one. Your own is nearer, cheaper and faster - and other players' hauls through it pay you.
Things that are easy to miss
- Hills give +25% production to a Quarry, Copper Mine or Iron Mine built on high ground.
- Goods must reach the market before you can list them - pressing List will courier them there first, paid out of the sale.
- The store sells you 10 citizens, ever. After that, growth means breeding at a Hospital. Plan for one.
- Feed your workers. Each needs 5 nutrition a game-day - Bread is 2, Egg 3, Milk 4. Hungry workers produce less, and it compounds.
- Offices pay from the global pot and grow to a 2×2 tower at Level 5 by merging with your own adjacent offices.
Land
Every building sits on land you own. Land is bought from the unowned map at a price that rises the more nearby cells are already owned - a cluster of owned land makes the next plot next to it more expensive, so the earliest land in a growing area is the cheapest it will ever be.
Clearing
A freshly-bought plot isn't ready to build on straight away - it needs clearing first. You can either pay a flat w3ULL fee to clear it yourself instantly, or list it as an Excavation job on the Jobs Board and let another player clear it for you (they get paid for the work, plus the Dirt/Gravel/Granite they dig up).
Reselling land
Once you own a cleared, empty plot (nothing built on it), you can list it for resale at the current market price. Any other player can buy it directly from you - it's a real w3ULL transfer between your accounts, not a shared pool. The seller receives 85% of the price; 13% goes to the Global Fund and 2% to Government Tax. The full five-way fund split only applies when a plot is FIRST bought from the map - a resale is a player-to-player trade, so the city takes only this smaller transfer fee.
Buildings & Production
Placing a building costs a one-time bundle of w3ULL and materials, and requires you to already own the (cleared) land underneath. Once placed, a building runs on a production cycle: it takes a certain amount of time to complete a batch, then you collect the output. Staffing citizens in a building increases how much each cycle produces - an unstaffed building still trickles out 25% of its range, so you're never fully stalled, but crews are where the real output is.
Cycle lengths run 7 game-days at Level 1, then 6 / 5 / 4, down to 1 day at Level 5.
Buildings can be upgraded through levels, each one faster and more productive than the last, and requiring more workers to run at full output. At the final level, four adjacent same-type Level-4 buildings can be merged into one larger Level-5 landmark building instead of upgrading further. Level-5 producers run 1-day cycles with a higher output roll.
What a cycle actually pays
Every completed cycle rolls an output in the building's min-max range, then multiplies:
output = min + (max − min) × qualityQuality multiplies five 0-1 factors: staffing (unstaffed floors at 25%), crew quality (worker stats vs what the building wants), influence (location, 0.40x-1.60x), wired & piped (a recipe that burns Energy wants a cable, one that burns Water wants a pipe), and fed & watered workers. No dice: the MAX only when everything runs at 100%, the minimum whenever it runs at all. The QUALITY tile on every building shows your exact number.
Recipes charge per completed batch (the RUNNING COST chips) - Energy is the root of the chain (a Level-1 Power Plant runs free), Water costs a little Energy, and every tier above consumes the tiers below. Cycles bank into a store worth two full batches: a full store freezes the clock (progress kept) until you collect, while running out of inputs loses the elapsed time. Every building is collected manually - a van hauls the goods to your nearest hub (see Logistics). Demolishing a building refunds 50% of all materials spent on it (never the w3ULL).
Construction times
| Level | 1 | 2 | 3 | 4 | 5 |
|---|---|---|---|---|---|
| Build/upgrade wait | 1 h | 3 h | 6 h | 12 h | 20 h |
Waits are real time at normal speed. Impatient? Post a Construction Board job and pay another player to rush it.
House capacity
| House level | 1 | 2 | 3 | 4 | 5 (merged) |
|---|---|---|---|---|---|
| Citizens housed | 4 | 8 | 16 | 24 | 96 |
Buildings that make more than one thing
Most buildings make a single good. A few are workshops: they hold a list of recipes and you choose which one is running. The building panel shows a MAKING: X - tap for Y button that cycles through them.
| Workshop | Recipe | Inputs per unit |
|---|---|---|
| Components Plant 2x2, one game-day per unit | Battery (default) | Copper 10, Steel 6, Glass 2 |
| Solar Panel | Glass 12, Sand 20, Copper 6, Steel 2 | |
| Water Tank | Steel 12, Concrete 8 | |
| Car Parts ×3 per cycle | Steel 8, Copper 4, Glass 2 (per part) | |
| Car Assembly Plant 2x2, one game-day per unit | Car (default) | Car Parts 3, Battery 1 |
| Van | Car Parts 5, Battery 1 | |
| Lorry | Car Parts 10, Battery 2 |
This is a two-stage chain: raw ore feeds the Components Plant, and the Components Plant feeds the Car Assembly Plant. Vehicles are worth building because they retire a hire fee forever (see Logistics).
Advanced Builds (2x2)
The ADVANCED BUILDS row in the Economy flyout is a catalogue of the big single-level projects: they take four plots, have no upgrade ladder, and carry a materials bill you plan for rather than stumble into. Costs shown there are read live from the game data, so they can never disagree with what you are charged. Place them the normal way - select an owned plot, then BUILD.
Citizens & Housing
Citizens are the workers who staff your buildings. You buy them from the Citizen Store (or from another player via the Citizen Market), and each one has six qualifications (Strength, Endurance, Charisma, Intelligence, Agility, Luck) that determine how well they perform different kinds of work.
House vs. Hotel
Houses are permanent, free housing you build once - a citizen who moves in stays housed indefinitely.
Hotels are paid temporary housing, billed per guest per period. They exist specifically for newcomers: if you don't have a spare House yet, checking a citizen into a Hotel gets them working immediately while you build permanent housing, at the cost of an ongoing bill instead of a one-time build.
Houses and Hotels always occupy one plot, at every level including 5.
House styles
Placing a House opens a style chooser - the same building, different architecture, so a district can be given a look rather than being a field of identical boxes.
| Style | Notes |
|---|---|
| Style A | The original. Buildable anywhere. |
| Apartments | Best fit for ordinary inland plots. |
| Modern | Buildable anywhere. |
| Coastal | Sand plots only. Greyed out with NEEDS SAND anywhere else - beach villas belong on the beach. |
| City Brick | Brownstone walk-ups for dense districts. |
The Villa is a separate 2x2 build in the Advanced Builds catalogue rather than a House style.
Jobs Board (no building required)
Not every way to earn w3ULL requires owning a building. The Jobs Board has several boards any player can work, regardless of what they own:
| Job | What it is |
|---|---|
| Gathering | Plant & tend by hand - no citizen or building needed. Free crops: Sapling → 10 Lumber, Wheat → 5 Bread (5 waterings each, 25-35 min apart). Paid livestock: a Chicken (8,100 w3ULL) gives 5 Eggs OR 2 White Meat after 9 tends - the reward is random; a Cow (12,150 w3ULL) gives 5 Milk OR 1 Red Meat after 12 tends. |
| Excavation | Clear someone else's uncleared plot. Paid a flat fee plus 8 Dirt + 2 Gravel per dig - deliberately modest, free-to-play is a grind. Better shovels dig faster, they don't yield more. Dirt and Gravel feed the mines and Concrete, so diggers always have buyers. |
| Courier | Haul a building's accumulated output to its owner for a fee, taken from the owner's own w3ULL and split between you and the city Treasury. |
| Production Assist | An owner can post a paid hire (4,860 w3ULL) to have their building's current production cycle finish sooner - accepting one means confirming periodically until the cycle completes early, for a fee paid by the owner. Max 3 hires per cycle. |
| Construction Board | Rush another player's building or upgrade wait for a fee they set - the construction finishes early and you pocket the w3ULL. |
Markets
The materials market is player-to-player. Every w3ULL paid comes from a real buyer and goes to a real seller - nothing is minted.
Selling
- Goods must physically be at the market before they can be listed. Pressing List couriers them there first, paid out of the sale.
- Set your own price. The recommendation is a guide, not a rule.
Buying
Purchases are delivered, not teleported. You choose where they go - the city's public warehouse, or one of your own - and pay carriage and Energy for the journey, exactly like any other haul.
Power is listed as Energy on the market - it is the same resource, named consistently with the fuel you pay for hauling.
Batteries come in four rarities
A Components Plant making Batteries produces one per game-day, and each one rolls a rarity when it is collected. They are four separate goods with four separate market prices, so you can see the going rate for each at a glance.
| Rarity | Chance | Power held |
|---|---|---|
| Battery (common) | 64% | 2,000 |
| Rare Battery | 30% | 4,000 |
| Epic Battery | 5% | 7,000 |
| Legendary Battery | 1% | 10,000 |
Influence Points (★)
Every building carries an Influence Points score - the gold star number on its panel and cards. It is the game's single measure of how much a building matters, and it drives the Influence leaderboard and Office income.
★ = base IP × level × location multiplier (0.40x-1.60x)A Level-3 Brick Kiln in a decent spot: 45 × 3 × 1.10 = ★149.
Base IP by building
| Base IP | Buildings |
|---|---|
| 10 | House |
| 25 | Hotel |
| 30 | Power Plant, Water Plant, Depot |
| 35 | Quarry, Sand Pit, Lumber Camp, Warehouse |
| 40 | Copper Mine, Iron Mine, Market |
| 45 | Brick Kiln, Glass Works, Asphalt Plant |
| 30 | Villa |
| 50-55 | Concrete Plant (50), Steel Mill (55), Hospital (55), Components Plant (55) |
| 60 | Car Assembly Plant |
| 65 | Office |
The location multiplier
Neighbouring buildings project influence fields that fade with distance; and roads add Economy (+3 per nearby road cell, capped at 24). Your building weighs what lands on its cell and the result is clamped between 0.40x and 1.60x - placement swings output four-fold, worst spot to best. The Stats tab's WHY THIS NUMBER breakdown names every source ("2x Hotel -0.05"), and the Influence rules button shows the full category-vs-category matrix.
World share and Offices
The sum of every building's ★ is the world total - the top-left trophy pill shows your own score and opens the Leaderboards. Offices split the Global Fund's daily release by ★ ratio: your Office's share = its ★ ÷ the combined ★ of every staffed Office. Upgrade it, place it better, or out-build rival Offices - an unstaffed Office earns nothing.
Storage & Logistics
Nothing moves itself. Goods are made in a building, sit in that building's yard, and then have to be carried to a warehouse by a courier you choose and pay for. Getting good at this is most of the game.
The two steps: COLLECT, then MOVE
| Step | Where | Cost | What it does |
|---|---|---|---|
| COLLECT | Production tab | Free | Moves finished output into this building's own yard. Instant. |
| MOVE GOODS | Logistics tab | Fee, Energy and time | Hauls the yard to a warehouse. This is the part that costs. |
Courier options
Open COURIER OPTIONS on the Logistics tab to compare every way of moving a load. Pick the amount first - you do not have to move everything.
| Courier | Per trip | Cost now | Cost later |
|---|---|---|---|
| Free courier | 50 | nothing - no w3ULL, no Energy | keeps 20% of the load |
| Car (hired) | 50 | hire fee + Energy | - |
| Van (hired) | 100 | hire fee + Energy | - |
| Lorry (hired) | 300 | hire fee + Energy | - |
| Your own vehicle | 50 / 100 / 300 | Energy only - no hire fee | - |
A vehicle carries the whole load, in as many trips as its capacity needs. Trips are what burn Energy and time, so a lorry moving 300 at a time is dramatically cheaper to run than a car doing the same job in six runs - that is the entire reason to use the bigger vehicle.
Owning your own vehicles
The City Depot's hire fleet is five vehicles for the entire world, and each one is locked for the whole round trip while it works. That is fine early on and increasingly painful later - the vehicle you want is out on somebody else's job.
Build a Car, Van or Lorry at a Car Assembly Plant (or buy one on the market), then open COURIER OPTIONS and press PUT A LORRY ON THE ROAD. The vehicle is consumed and becomes a permanent part of your own fleet, listed above the hire rows and marked YOURS.
| Vehicle | Capacity | Hire fee you stop paying | Roughly pays for itself in |
|---|---|---|---|
| Car | 50 | 972 w3ULL a haul | ~21 hauls |
| Van | 100 | 2,997 w3ULL a haul | ~10 hauls |
| Lorry | 300 | 9,963 w3ULL a haul | ~6 hauls |
The journey
A job runs depot → your building → warehouse, shuttling back to reload between loads, and finally back to the depot. So three loads is five crossings, not three. Distance is measured on the real road route, shown in KM, and the green line on the map is the exact route you are paying for.
| Number | Value |
|---|---|
| One road cell | 0.1 KM |
| Energy (fuel) | 1 per 0.1 KM, per trip |
| Speed - Dirt | 15 min per 0.1 KM |
| Speed - Gravel / Asphalt / Concrete / Smart | 12 / 9 / 6 / 3 min per 0.1 KM |
Better roads do not cut the fee - they cut the TIME. Paving your regular route is how you make a slow economy fast.
Where your goods actually are
Materials exist in places, not in an abstract pile. Every unit you own is sitting somewhere:
| Place | Notes |
|---|---|
| The city's Public Warehouse | Unlimited and free to store. Everything lands here by default. Click it on the map to see your stock. |
| Your own warehouse | Hauls whose nearest hub is your warehouse land there. Nearer = cheaper and faster. |
| In transit | On the road, in a vehicle. Yours, but not yet arrived. |
You have no free storage allowance. Your own capacity is whatever warehouses you have built - everything above it simply sits publicly. Spending drains the public warehouse first, so goods you deliberately stockpile on your own land are consumed last.
Power and Water skip all of this. They arrive down the pipes and wires you have already built, so COLLECT is their whole journey - no courier, no fee, no waiting.
Citizen Welfare - Stamina, Food & Breeding
Stamina: work and rest
Every citizen has a personal stamina bar (0-100). Working drains it; resting at their home or hotel refills it - and the whole loop runs itself:
| Number | Value (game time) |
|---|---|
| Full work day | 100 → 0 over 24 hours of continuous work |
| Rest at a House | full recovery in 8 hours |
| Rest at a Hotel | full recovery in 4 hours - hotels are premium recovery |
| Clocking off | below 20% a citizen stops counting toward staffing and rests automatically |
| Returning | rejoins work automatically at 80% |
| Hungry? | an unfed workforce recovers at half speed |
One citizen therefore covers roughly 75% uptime - own spare citizens and rotate crews to keep buildings at full output around the clock. Check everyone's bars in My Assets → Citizens.
Feeding & watering your workforce
Feeding is fully manual - nothing is ever consumed automatically. Each citizen has a Hunger bar and a Thirst bar that drain while they work; a citizen performs at the LOWER of the two, and it feeds straight into production quality. Click a citizen (any citizens list) to open their card and feed or water them - one food and one drink per citizen every 30 minutes: Bread +5%, Egg +10%, Milk +15%, White Meat +45%, Red Meat +100%; Water +5%, Flask Of Water +20%.
Hand-feeding: open a citizen's details card (My Assets → Citizens, or click any citizen row) and FEED them one item for an instant stamina boost - Bread +2%, Egg +5%, Milk +8%, White Meat +45%, Red Meat +100%. One item per citizen every 2 hours. A Flask Of Water (craft: 50 Water + 2 Steel, a tradeable High-Tech product) instantly rehydrates the whole workforce.
Breeding
| Number | Value |
|---|---|
| Fee - your own hospital | ~10,000 w3ULL, sunk into the shared city funds |
| Fee - another player's hospital | ~50,000 w3ULL: ~20,000 to the hospital's owner, ~30,000 into the funds - owning a hospital is a real business |
| Gestation | 24 hours (game time) |
| Generations | each generation has an offspring allowance. The store sells at most 10 citizens per account, ever - every citizen beyond that must be bred, which is what makes hospitals and bloodlines an economy |
Utilities (Pipes & Wires)
Buildings need Power and Water to run properly. Both come from plants you build, and both travel through networks you lay.
Laying the network
Pipes and wires must connect: every new cell has to touch one you already own, growing outward from the plant. An isolated cell is refused. Every cell you lay also counts toward your share of the Road / Utility Fund payout.
How much you need
A fully-staffed plant produces up to 518 Energy or 1,037 Water per cycle at Level 1, rising to 1,020 and 2,041 at Level 5. Heavy industry - Brick Kiln, Steel Mill, Glass Works, Asphalt Plant - burns 100 of each per cycle, so expect to run several plants of each kind to support a full estate. Utilities are a real part of a city, not an afterthought.
Energy output was halved to bring it in line with Water. Water has a constant per-citizen drain - everyone drinks - while Energy only had one-off sinks, so Power piled up unsold while Water starved. Expect Energy to stay genuinely scarce.
Power is also the fuel for hauling: 1 Energy per 0.1 KM per trip. Running out of Energy stops your lorries as surely as it stops your factories.
Roads
The island's road network already exists - 923 cells of it - and every cell starts as dirt. Paving is a shared, permanent project: anyone can contribute, and the road fund splits the cost between everyone who chipped in.
What a tier costs, and what it gives
| Upgrade into | Cost per cell | Speed |
|---|---|---|
| Gravel | 7,840 w3ULL + 20 Gravel + 8 Wood | 12 min per 0.1 KM |
| Asphalt | 15,680 w3ULL + 4 Asphalt + 12 Wood + 8 Bricks | 9 min |
| Concrete | 31,360 w3ULL + 6 Concrete + 16 Bricks + 8 Wood | 6 min |
| Smart Road | 62,720 w3ULL + asphalt, concrete, steel and 12 Bricks | 3 min - five times dirt |
City Funds
Every first-time land sale (buying from the map) and every building cost (placement + upgrade) splits into five shares: nothing is deducted from what you pay - the building or plot is yours in full - these shares are additional w3ULL the game creates alongside your spend, so the wider economy grows with city activity instead of just rewarding the one player spending.
Global Fund - 55%
The big one - this is what makes staffed Offices worth running. Grows continuously from land and building spend, then releases up to 1/360th of its balance each day into every staffed Office's own accrued balance, split by how much of the map that Office's influence dominates. Collect your Office's share into your wallet whenever you like - no rush, it just keeps building.
It also takes half of every courier fee - see the Worker Fund.
Road / Utility Fund - 20%
Infrastructure investment, and it now pays out: up to 1/90th of its balance a day is shared among the players who paved roads and laid utility cells, in proportion to what each contributed. Utility cells count toward your share as well as roads.
Worker Fund - 5%
Pays the flat w3ULL rewards for Jobs Board work (Excavation etc.) and is funded directly by self-clear costs. Courier fees are split 50/50 with the Global Fund rather than all landing here - the fund was growing far faster than it could ever pay out.
Leaderboard Fund - 10%
Building up toward weekly prize payouts for leaderboard winners - the payout schedule isn't built yet, but the pool is already accruing real value.
Government Tax - 10%
A broader 10% cut that applies to every paid action in the game, not just land and buildings - land sales, building costs, and buying citizens all contribute. No withdrawal mechanism yet; it simply accrues.
Leaderboards
Three rankings track different kinds of success: Net Worth (land + buildings + w3ULL), Influence (your total Influence Points - the sum of every ★ you own, also shown as your share of the world's 10,000), and Jobs Completed (how much Jobs Board work you've done). You don't need to own anything to climb the Jobs leaderboard - it's the direct counterpart to the Net Worth one.